How to Create WiFi Hotspot on Windows 10 Without Softwares
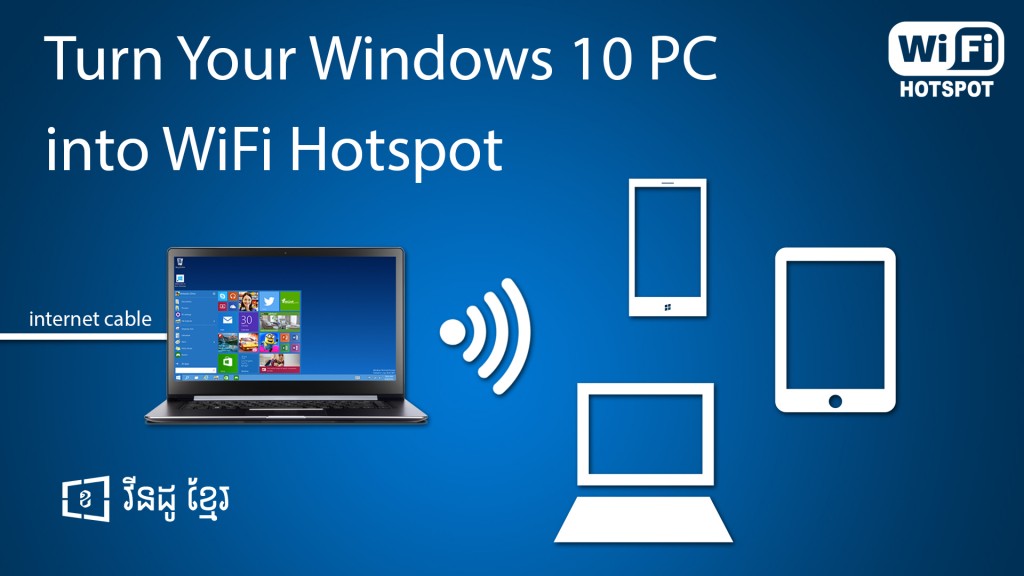
There are many methods that we can use to create a WiFi Hotspot on your computer. There are many applications that we can use to create WiFi Hotspot such as MyPublic WiFi (free), mHotspot (free), Connectify (commercial, lite version available).
From my own experience application is easier to create a WiFi hotspot but it may make our computer performance slower than before especially Connectify. Today, I would like to share how to create a WiFi hotspot in Windows without using any software.
System Requirements
In order to create a WiFi hotspot, your computer must meet the following requirements:
- OS: Windows 7, 8, 8.1 or Windows 10
- Internet Connection network adapter
- Wireless Adapter (hosted network supported)
How to Verify Wireless Adapter Hosted Network Supported
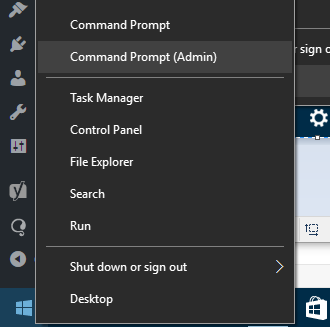
- Right-Click on Start Menu > Command Prompt (Admin)
- Enter the following command:
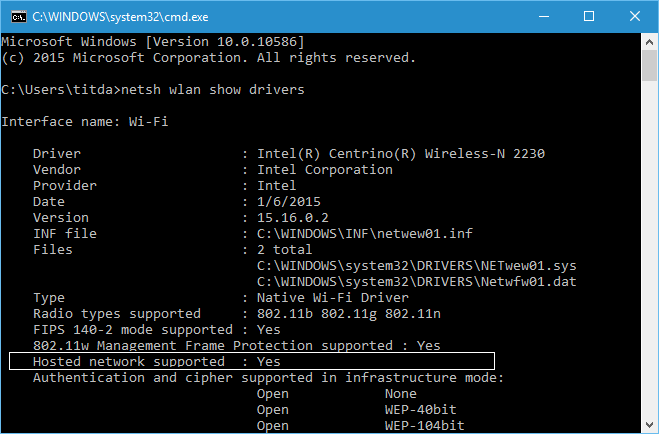
netsh wlan show drivers
- Next, you will see as follow:
- If you get “Hosted network supported: Yes”, it mean that your wireless adapter is support hosted network and you can create WiFi hotspot from this wireless adapter
How to Create WiFi Hotspot
You will need to create 3 Windows Batch files for using later on:
- start.bat – used to create and start WiFi Hotspot
- stop.bat – used to stop current WiFi Hotspot
- check.bat – used to check current WiFi Hotspot status
How to Create Windows Batch File
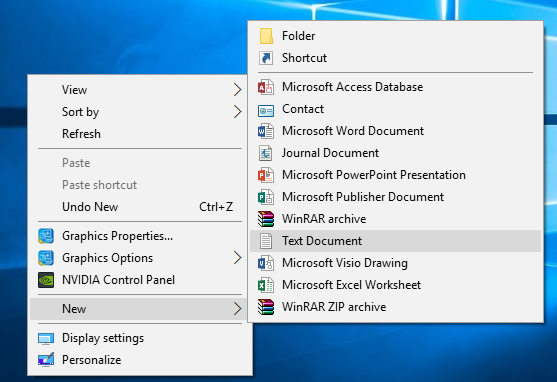
- Right-Click on Desktop > New > Text Document
- Rename document to the same as the three files above with (.bat) extension.
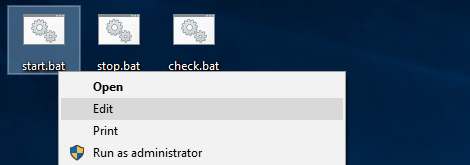
Next you will need to edit those 3 batch file by right-clicking on each file > Edit.
Enter the following text to the individual file.
start.bat
netsh wlan set hostednetwork mode=allow ssid=”My Personal Hotspot” key=”12345678″
netsh wlan start hostednetwork
- “My Personal Hotspot” – the name of WiFi hotspot (SSID).
- “12345678” – key for accessing this WiFi hotspot.
stop.bat
netsh wlan stop hostednetwork
netsh wlan show hostednetwork
check.bat
netsh wlan show hostednetwork
pause
How to Use
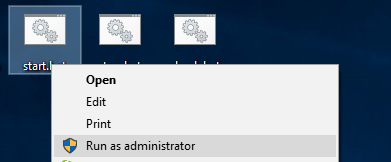
To create or start WiFi hotspot, you just need to execute the start.bat by right-clicking on start.bat > Run as administrator.
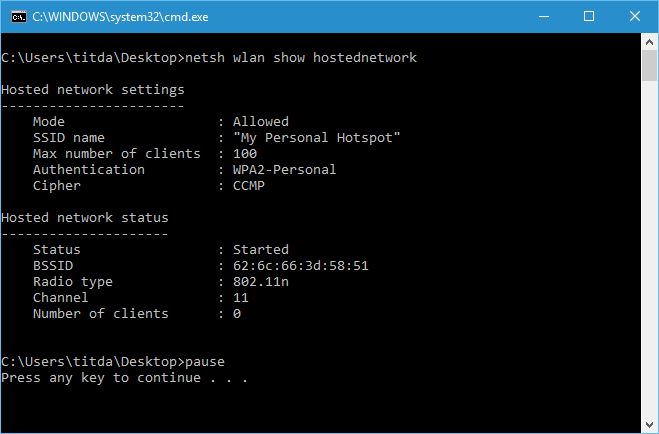
To check or verify the WiFi hotspot we have just created, you can execute check.bat and if the WiFi Hotspot is running correctly, you will see the result as below:
From now, your phone, tablets or computers are now can be connected to this WiFi hotspot. Yes, those devices can be connected however they will have no internet connectivity.
How to Share Internet Connectivity to New WiFi Hotspot Connection
To allow devices connected to your WiFi hotspot connecting to the internet, you will need to share internet connectivity from your Ethernet adapter or other connection that has internet connectivity.
Note: the following step is a requirement for a new created WiFi hotspot connection only, next time you will not need to complete the following steps, just run start.bat only.
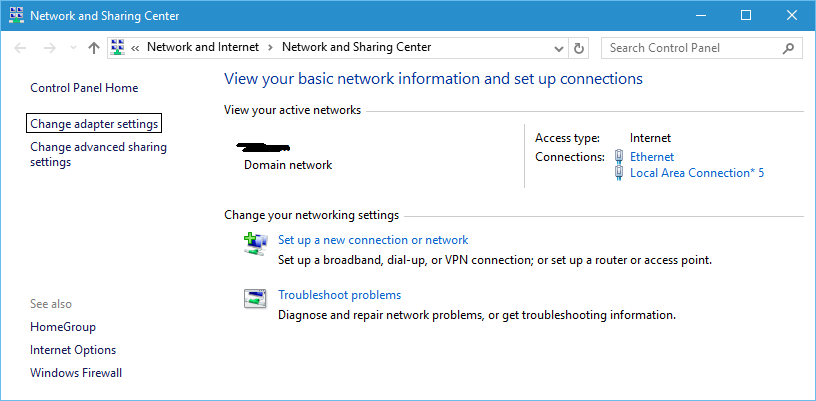
To share internet connectivity from your Ethernet adapter, you need to access Networking and Sharing Center.
Right-click on Network symbol in system tray > Open Network and Sharing Center.
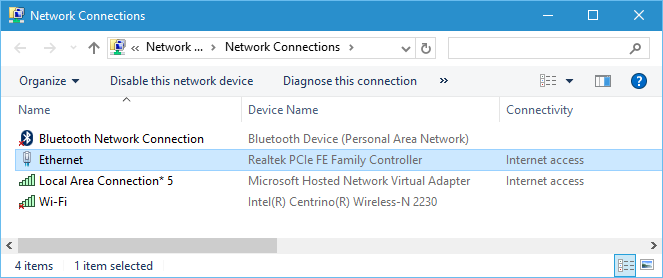
Go to Change adapter settings.
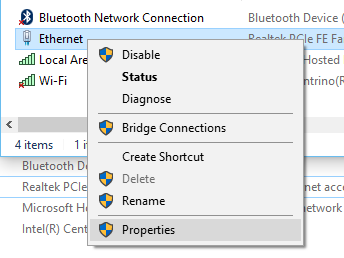
Right-click on Ethernet adapter > Properties
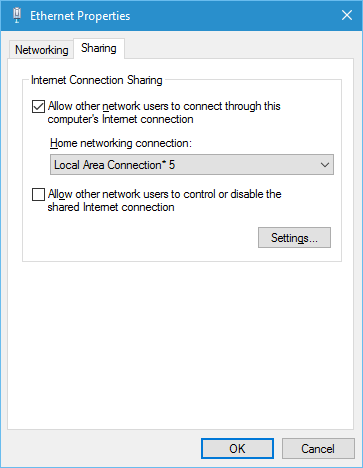
Click on Sharing tab and then check the option for Allow other network users to connect through this computer’s Internet connection.
Next choose Local Area Connection* 5 from the Home networking connection. Then click OK.
Now your WiFi hotspot connection now has internet connectivity and every device access to this hotspot will able to access to the internet.
Related Articles
Comments ()
Popular Articles
 How to Install .XAP .APPXBUNDLE on Windows 10 Mobile Without Computer
 How to Root & Interop Unlock the Windows 10 Mobile devices
 How to Install Android Apps on Windows 10 Mobile
 Download Official Windows 10 Mobile Wallpapers From Here
 How to Create WiFi Hotspot on Windows 10 Without Softwares
 How to Install DHCP Server on Cent OS
 How to Use Windows Phone Recovery tool
